
HomeMatic eQ-3
I really like the HomeMatic system for a number of reasons. These are SmartHome components developed by ELV, the electronics mail order company, which represent a wide range of sensors and actuators. I like the fact that you can buy almost all of the components ready made or as a kit - the kits are attractively priced and offer the opportunity to refresh your soldering skills.
With a little patience this works very well - the kits are well prepared, the instructions are clear. And of course you can impress your offspring lastingly when daddy is soldering circuits together ;) For all components that switch 220V installations, I buy the finished products for safety reasons. Too big for me is the danger that a faulty solder joint can cause a short circuit and a cable fire.
Excellent are the window sensors solved. On the one hand they work optically and not magnetically like most others. With magnetically working sensors, this information is lost when the system is rebooted - and you can confuse most sensors by quickly opening/closing them. This is not the case with optical sensors: the sensor always knows whether the window is closed or open. All components of this system also have a feedback channel and send status changes until they are confirmed - i.e. messages are not simply lost. The communication between the various components and the control center is AES encrypted.
CCU - The HomeMatic control centre
You need a control panel for all HomeMatic components. This centre handles (encrypted) communication with the components, queries their status and can also switch other HomeMatic actuators to certain sensor inputs. For example, the heating can be turned down if a window sensor reports an open window. This internal logic is rather uninteresting for me because it only works with the HomeMatic components (as with all systems). In my home automation system I therefore process the sensor data centrally in OpenHAB and can also switch actuators from other systems to sensor inputs from one system.
The central unit at HomeMatic is called CCU. And it is available in various versions, but the main differences are the switchable logic (not interesting to me) and the components to be addressed ("HomeMatic", "HomeMatic IP" and "HomeMatic Wired"). I bought a hm-cfg-usb-2 on eBay for very little money, which can be connected to the Raspberry and thus makes the Raspberry itself the central unit: This works perfectly for me, because there is no need to have another device standing around that needs power.
HomeMatic SmartHome Central Unit CCU3
The flagship of the HomeMatic range at the moment. Here, logics can be clicked together via a web interface. In addition to HomeMatic and HomeMatic IP devices, this control panel can also handle HomeMatic Wired. This control centre also comes with a CloudMatic licence and works with the Philips HUE gateway and Amazon Alexa or Google Assitant.
HomeMatic SmartHome Central Unit CCU2
The predecessor model. Logics can also be created in a web interface. According to the data sheet, this version can handle HomeMatic and Home Matic IP components, but not HomeMatic Wired. The CCU2 can also communicate with the HUE gateway and knows Alexa and the Google Assistant.
HomeMatic configuration adapter LAN (HM-CFG-LAN)
Such a configuration adapter is well suited for home automation "do-it-yourself". This variant can be placed anywhere in the house where a network connection is available.
HomeMatic USB configuration adapter (HM-CFG-USB-2)
The same device with the same range of functions, but with USB interface. This variant is well suited if the Raspberry is to take over the role of the central unit.
Window sensors
The optical window sensors offer an encrypted bidirectional connection and can be interrogated by the central unit at any time. A change of state (open/closed) arrives very quickly and above all reliably at the central unit; usually the process including the desired subsequent action is completed within one second.
The window sensors are available as a finished component and a little cheaper and easy to solder kit.
Homematic IP wall switch for brand switches
The wall switch can replace an existing light switch. The adapters for common brands allow the original cover to be reused, so that at first and second glance no difference can be seen. When you press it, you will notice a difference: the wall switch is a push button and not a switch - and it can react to different events: short press, long press and double press; both at the bottom and at the top.
This is quite practical: I use e.g. the SHORT_PRESS event to switch lamps on or off (two groups of lamps via one switch); LONG_PRESS dims one group of lamps additionally.
Radio switching actuator for marker switches
In contrast to the pushbutton just described, this is a real switch here; so you can use it to switch a consumer on and off in the normal way without involving the control panel. As a special bonus, the control unit can also switch this actuator. One application for this device is the switching of outdoor lighting: every resident can easily switch the light on or off via the switch. In addition, however, the control unit switches the light on at dusk and off automatically at night, even if no one is at home.
The interface to HomeMatic: Homegear & hmland
Homegear is an OpenSource solution that can talk with multiple protocols. One of them is HomeMatic. Homegear is very fast and can easily run on the same Raspberry that runs the OpenHAB software. Again, there are some overlaps; Homegear can also map logic. But I only use Homegear as a communication interface, because I want to have all rules in one place. Using Homegear for control logic would increase the complexity of the system massively.
Since I didn't realize that I needed Homegear until I already had OpenHAB installed, I integrated Homegear into my existing system. Homegear also comes with a ready-made Raspbian image into which you can integrate OpenHAB again, as long as both are running in the end. Homegear supports a whole range of protocols; KNX, Zigbee and HUE, and HomeMatic are probably the most important.
# Install apt-transtport-https
apt install apt-transport-https

# Download and install Homegear's package validation key
curl apt.homegear.eu/Release.key | apt-key add -

# Add Homegear's repository to APT
echo 'deb apt.homegear.eu/Raspbian/ buster/' > /etc/apt/sources.list.d/homegear.list

# Update package information
apt update

# Install Homegear with all modules
apt install homegear homegear-management homegear-nodes-core homegear-nodes-extra homegear-homematicbidcos homegear-homematicwired homegear-insteon homegear-max homegear-philipshue homegear-sonos homegear-kodi homegear-ipcam homegear-beckhoff homegear-knx homegear-enocean homegear-intertechno homegear-nanoleaf homegear-ccu homegear-mbus homegear-influxdb
To communicate with the hm-cfg-usb-2 I use, hmland is still needed:
apt-get install libusb-1.0-0-dev build-essential git
git clone git.zerfleddert.de/git/hmcfgusb
cd hmcfgusb
make
sudo cp hmcfgusb.rules /etc/udev/rules.d/
Now you can connect the hm-cfg-usb-2 to the USB port (a USB extension does no harm; the stick is relatively large and otherwise covers the USB port next to it).
Then the service can be installed. In the directory /etc/systemd/system/ a file hmland.service is created with the following content:
[Unit]
Description=Homematic LAN Adapter service
After=network.target

[Service]
ExecStart=/home/pi/hmcfgusb/hmland -I -p 1000

[Install]
WantedBy=multi-user.target
The -l parameter (which simulates a LAN adapter) is important.
In Homegear, in the file /etc/homegear/families/homematicbidcos.conf the adapter is included as hmcfglan; host 127.0.0.1 and the port we just entered:
[HM-CFG-LAN]
default = true
deviceType = hmcfglan
host = 127.0.0.1
port = 1000
Finally, the individual HomeMatic components must be connected ("paired") with the new central unit.
sudo homegear -r
families select 0
pairing on
the control unit switches to pairing mode for 60 seconds. During this time the pairing button on the HomeMatic components can be pressed and the pairing process is completed.
If (as in my case) the HomeMatic components were paired to another central unit, they must first be reset to the factory settings.
I strongly recommend that you pair one component at a time so that you can keep track. Especially with many similar sensors (window monitoring), the only difference is the serial number.
After learning, the components will appear in the overview:
pi@raspberrypi:/etc/homegear/families $ sudo homegear -r
Connected to Homegear (version 0.7.45-3101).

Please type >>help<< to list all available commands.
> families select 0
For a list of available family commands type >>help<<.
Family 0> ls
         ID │ Name │ Address │ Serial Number │ Type │ Type String │ Firmware │ Config Pending │ Unreach │ Low Bat

            │                           │          │               │      │                           │          │                │         │
          1 │ │ 4E4CD4 │ NEQ094**** │ 00C7 │ HM-Sec-SCo │ 1.0 │ No │ No │ No
          2 │ │ 4FA7B5 │ NEQ129**** │ 00E0 │ HM-RC-2-PBU-FM │ 1.1 │ No │ No

Family 0>
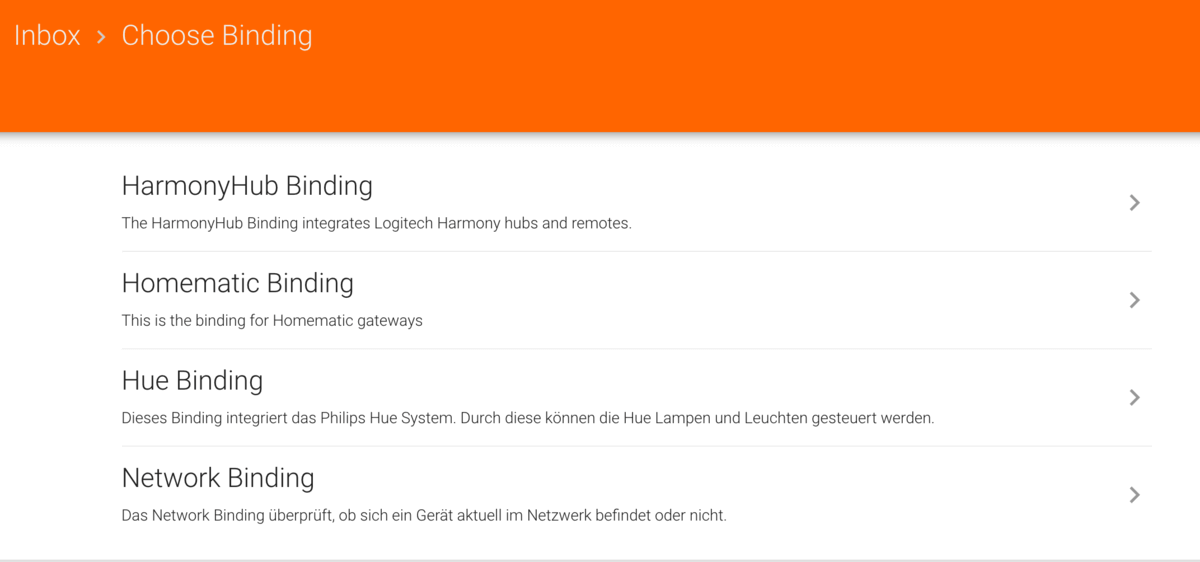
Now we can make the HomeMatic components known in OpenHAB. To do this, we install the HomeMatic binding once (PaperUI -> AddOns -> Bindings -> HomeMatic). Each time we want to make a new component known, we go to the Inbox, click the + and select the HomeMatic binding. Now all the HomeMatic components that are not yet known are in the Inbox and we can work with them.
In /var/log/openhab2/events.log the events are logged, e.g. a push on a HomeMatic button:
homematic:HG-HM-RC-2-PBU-FM:0eb8f8ab:NEQ129****:2#BUTTON triggered SHORT_PRESSED
Although OpenHAB comes with PaperUI, a graphical interface that allows you to configure logic, I quickly moved on to storing the configurations in the OpenHAB files in /etc/openhab2/. This gives me better control and allows me to version my configuration more easily.
The next part deals with the integration of Hue lamps and the linking of HomeMatic sensors and Hue actuators: We're gonna turn a light on and off (applause!).
Comments (0)
No comments found!